Prototype-driven development
It is quite a common situation, when after developers start building something – there are alterations coming along the product development process that lead to redoing of some minor or major parts, or even lead to changes in global architectural solutions. Redoing is a sheer waste of time and resources, and it all happens due to lack of deep and complete understanding of the future product. Prototype-driven development allows teams to skip all levels of misunderstanding, as it provides you with prototypes on all levels and at any time of project evolution.
The basic concept is to provide developers not with a set of tasks and descriptions, but with prototypes that will cover everything.
How to start
Once you have decided to go with this approach, stop thinking of what you already know is true.
If you have an existing product
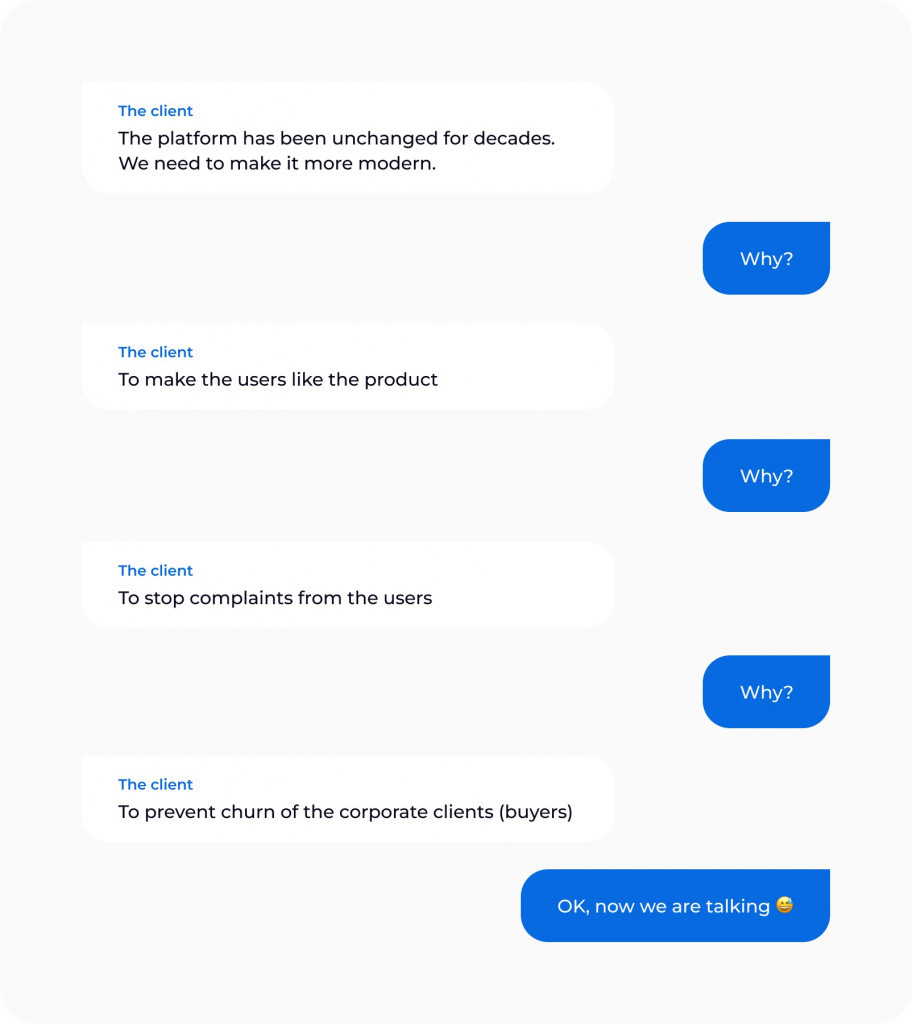
Remember that everything you know about your product might be wrong. It is quite a common situation, when company owners have a superstition that everything is clear to them, that they know the market and their product. However it is often quite wrong. The market is always changing and you shall always doubt your vision and revise it.
Try thinking of it as if you did not have an existing product and you just would like to get to this market. There are several useful methodologies such as JTBD, CJM and others that can help you find a starting point.
If you start a new product
It is still a good practice to go with CJM, business model pivoting, and then test all your theories on real future customers. Everything you think you know might appear to be a misconception.
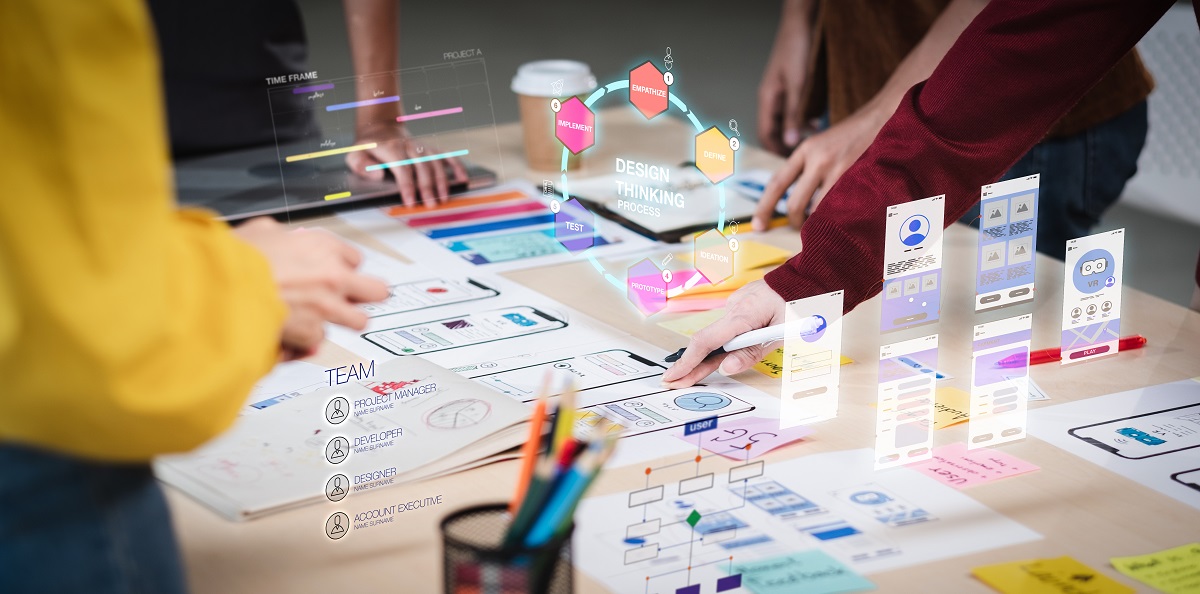
Design process
Covering all with diagrams
Once you are done with basic understanding of the business process, start building user flow diagrams. This shall also be tested and followed by multiple user interviews. On a recent project we did, the client was able to provide several role representatives we could interview. That resulted in a huge impact on our future designs. In the interviews that we carried out, we asked people how they actually used the existing system and what was important to them.
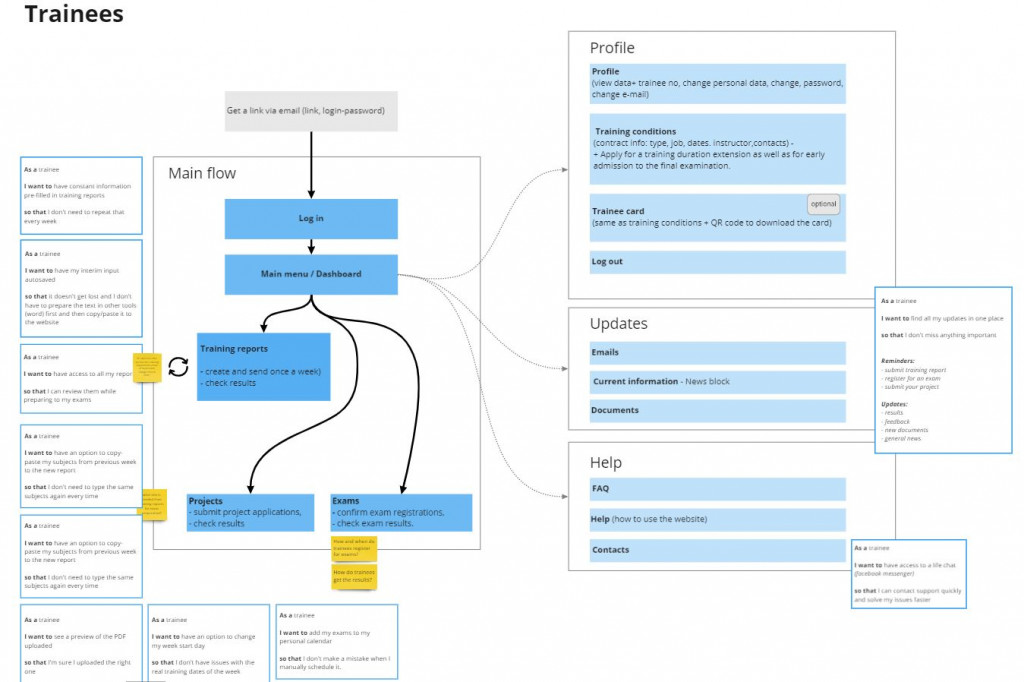
 We started with single user flows. At this stage we used the Miro tool for drawing our flows. You can also try using FigJam, which is the newest and most advanced tool.
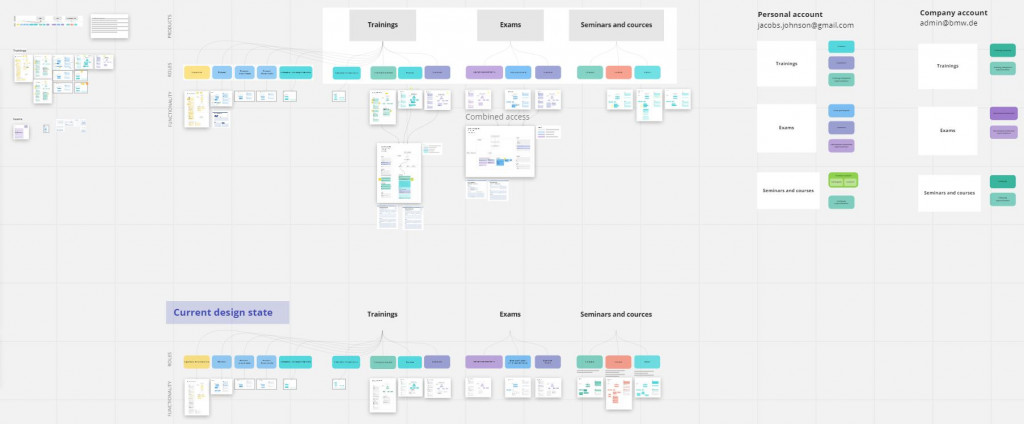
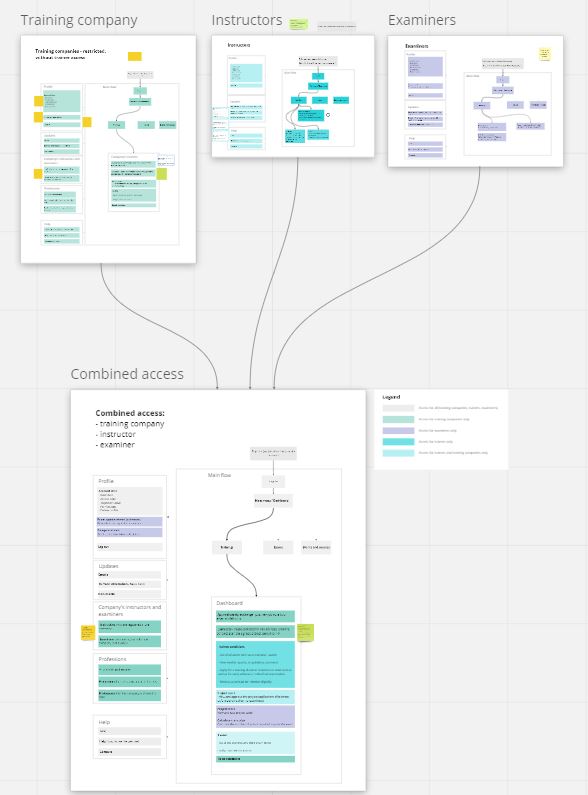
 Then we made combined flows to unify the interfaces.
And right here we started making wireframes of future interfaces to express the vision of future design. That was to help our client representatives and their customers have an understanding of how it will look like.
 Once you are sure everything is right and clear, you can move further.
Start drawing
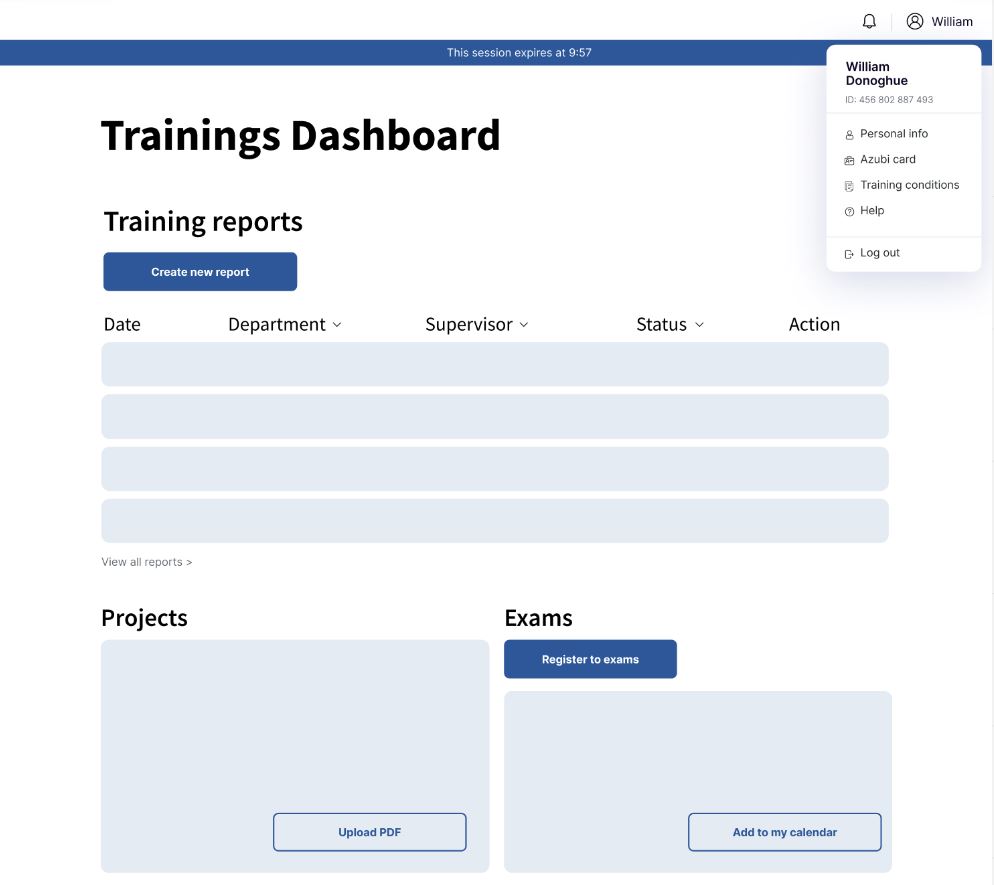
We used Figma for prototyping. Our first mockups were pretty raw, we copied some of them from our previous works that we had done in Miro.
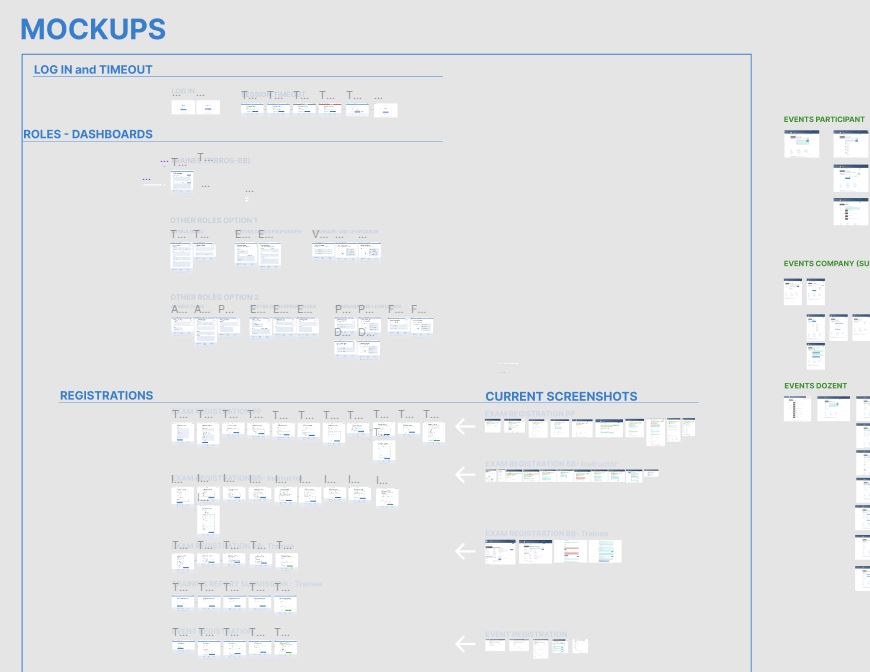
Remember to conduct some usability testing of the mockups as soon as you finish prototyping.
Draw everything in detail
This part is the biggest one and therefore it takes a lot of time.
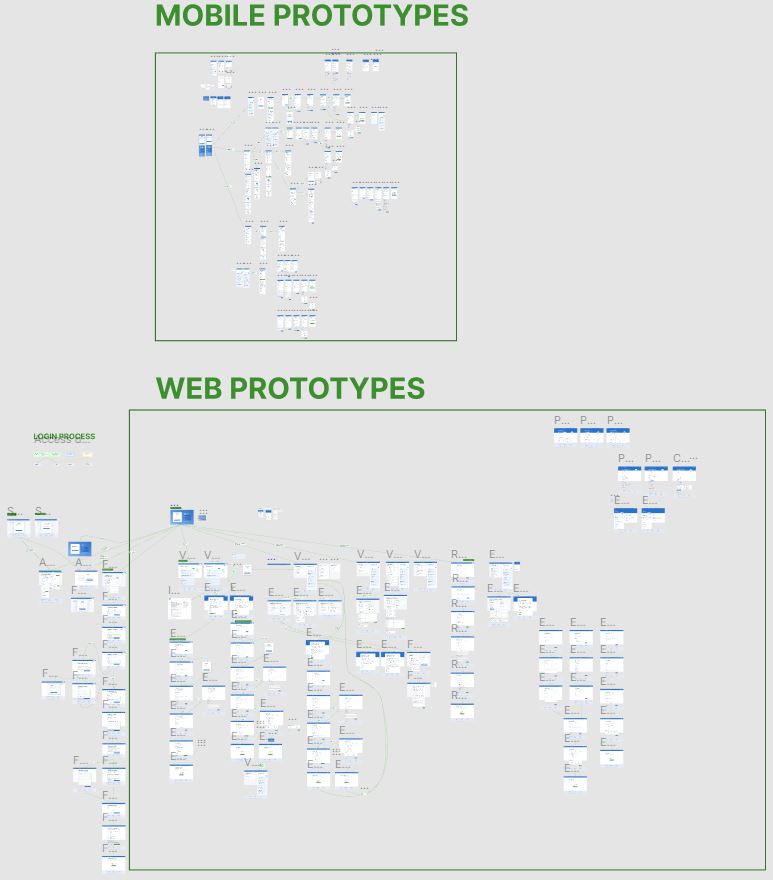
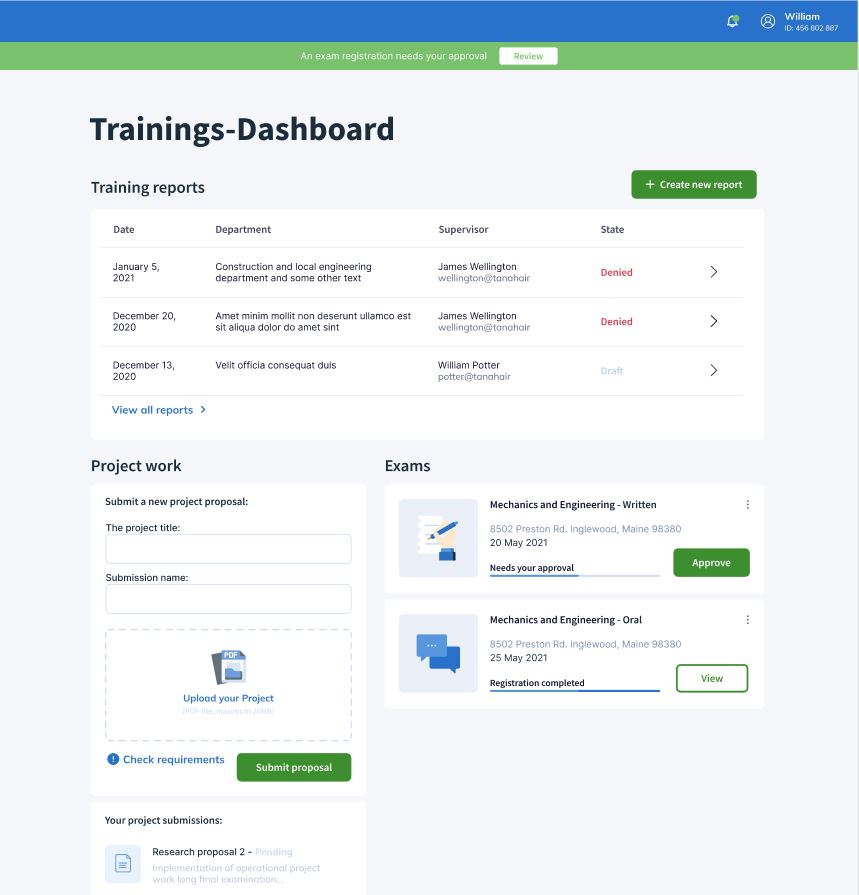
You should not only work on all the screens and their mobile versions, but also on the minor components with all their states. This will be very helpful for developers. And if you have made screens of pre-made components, it will take you a very short time to amend the designs.

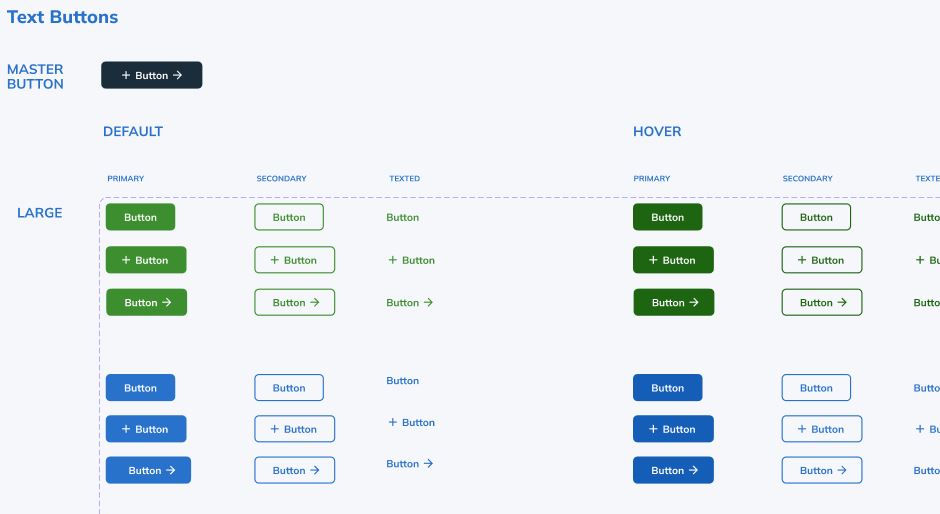
Finally, it’s a good practice to draw bigger components that will be reused within the interface.
And again, keep it in mind to test the final prototypes! At this stage you already have Figma-animated interactive prototypes that you can send to users and get their feedback. It is good to test the prototypes on all the roles and target audiences.
In the end

The costs
The whole design project cost approx 500 person hours of senior UX designer work. This covered all: business analysis (diagrams), mockups, prototypes, and testing.
Is testing expensive?
No, usually it takes 0.5 to 1 hour per interview – that is the time spent by the UX designer. In our case we spent approx 10 hours on interviews and 20 hours on making corrections following the interviews.
Benefits
- You do not miss a thing and you are sure to cover all the scenarios from the start.
- Customers are happy at early stages as they are sure that the upcoming solution fits perfectly.
- You have something to show to every customer at all the stages.
- Everyone gets the big picture at the end of prototyping.
- Developers are sure what and how they have to do, they also like having the big-picture and detailed components.
- Developers do not spend time on re-doing some stuff.
When applicable?
When you have an old over-featured interface or you are building a product you expect to be highly-demanded at early stages. In fact, the only case when this approach is not suitable – it is when you are making a startup.
Developer’s comment
Maxim Remyga:
From the developer’s standpoint, it is both fruitful and satisfying to implement a well-thought-out prototype, mostly because of the clear certainty that your work is going to last. It makes a stark contrast to re-doing parts of the codebase over and over again. Nothing could be worse than a tantalizingly futile pursuit of catching up with an ever-changing design.
A consistent prototype aims to achieve coherence between high-level principles of the design guidelines and the specific UI library components. As a result, implementing a solid prototype comes with less effort and more joy for the developer. Not only does it save hours of tinkering with pre-built components, but also fuels a pleasant feeling when everything operates just as it should and fits together perfectly.